MASACP is engineered with unique multi-web-server flexibility. You can run Nginx, OpenLiteSpeed (with native LSCache & HTTP/3 QUIC), or OpenResty on the same server, and switch any existing website between them seamlessly in seconds with zero downtime.
Supported Web Server Engines:
- Nginx: Ultra-stable, lightweight, and the industry standard for PHP-FPM and reverse proxying.
- OpenLiteSpeed (OLS): High-concurrency event-driven server featuring built-in LSCache acceleration for WordPress and native HTTP/3.
- OpenResty: High-performance Nginx core empowered by LuaJIT for dynamic traffic routing and advanced security.
1
Checking Your Website’s Current Web Server
To see which web server engine is currently powering your website, follow these simple steps:
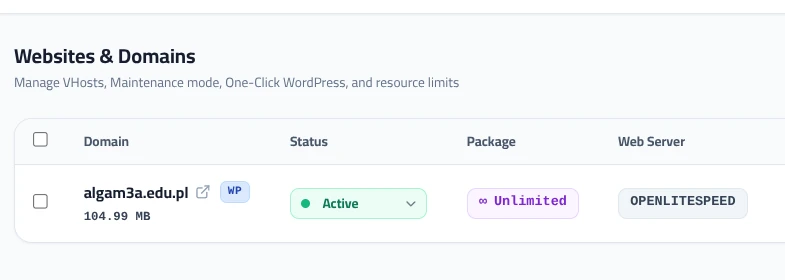
- From the left navigation sidebar, click on Websites.
- In the websites table, find your domain name.
- Look at the Web Server column: you will see an active badge displaying the current engine (e.g., OPENLITESPEED or NGINX).
2
Installing & Enabling Web Server Engines
Before switching a website to OpenLiteSpeed or OpenResty, make sure the engine is installed on your server:
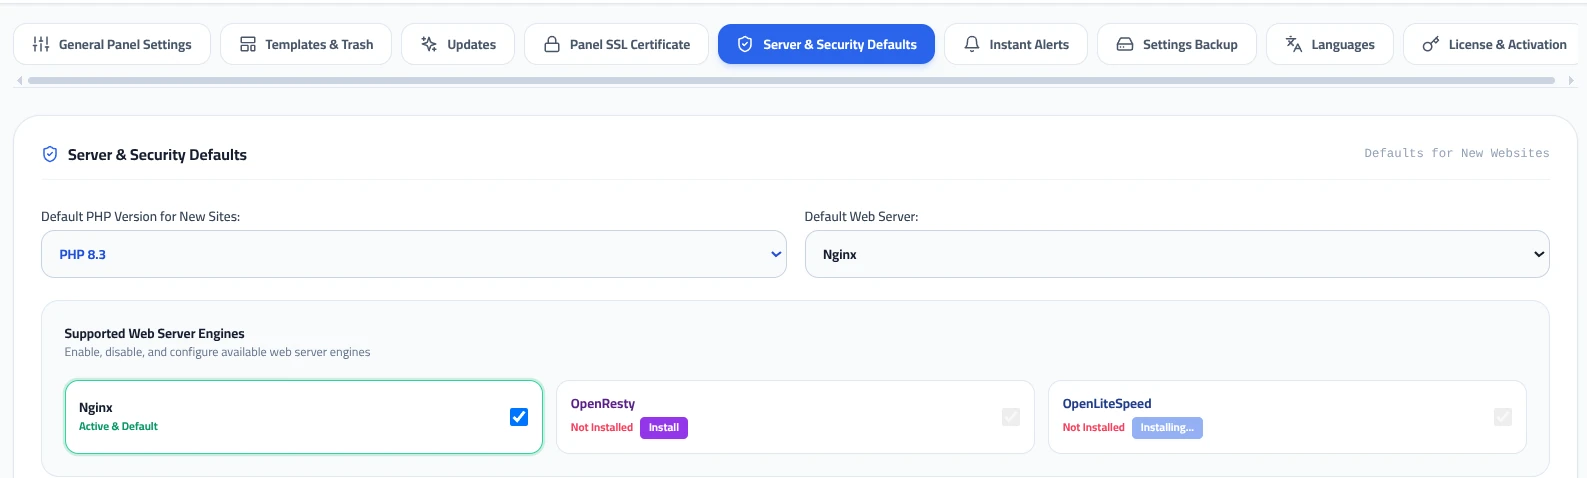
- Navigate to Settings in the main left sidebar.
- Click on the Server & Security Defaults tab at the top.
- Scroll down to the Supported Web Server Engines card.
- Locate the server you want to install (e.g. OpenLiteSpeed or OpenResty).
- Click the purple/blue Install button next to the desired engine.
- MASACP will download, configure, and initialize the web server service in the background. Once installed, its status changes to Installed / Ready.
3
Opening Website Settings
Now that your desired web server is installed, you can switch any of your websites to it:
- Go back to Websites from the left sidebar.
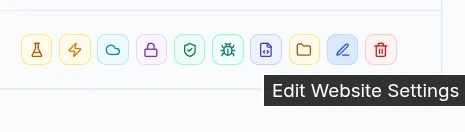
- In your website row, look at the action buttons on the right.
- Click the blue pencil icon titled Edit Website Settings.
4
Switching the Engine & Applying Changes
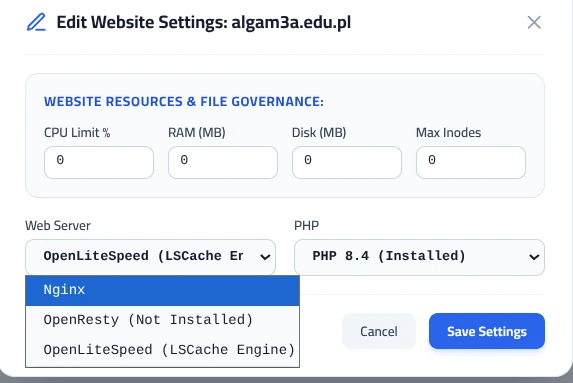
Inside the Edit Website Settings modal:
- Click on the Web Server dropdown menu.
- Select your preferred engine:
- • OpenLiteSpeed (LSCache Engine): Ideal for high-speed WordPress caching.
- • Nginx: Ultra-fast standard reverse proxy and static file handler.
- • OpenResty: For Lua-accelerated security rules.
- (Optional) You can also adjust the site’s PHP version or allocated CPU/RAM resource limits in the same window.
- Click the blue Save Settings button.
What Happens Automatically Behind the Scenes:
MASACP migrates your website’s Virtual Host configuration, links your Let’s Encrypt SSL certificates, maps the PHP-FPM socket, and reloads the new web server gracefully. Your visitors will not experience any downtime or dropped connections.
Post-Migration Recommendations
When switching a WordPress site to OpenLiteSpeed, install the free LiteSpeed Cache (LSCache) plugin from your WordPress dashboard to take full advantage of server-level caching, CSS/JS minification, and instant TTFB response times.
If you want all newly created websites to default to OpenLiteSpeed or Nginx automatically, you can set the Default Web Server in Settings → Server & Security Defaults.