Learn how to deploy and manage high-performance Next.js (SSR / SSG) and Node.js applications on MASACP using the enterprise PM2 Process Manager, automated reverse proxying via Nginx, multi-package manager support (npm, pnpm, yarn, bun), automated Let’s Encrypt SSL, and live PM2 console logging.
1
Prerequisite: Enable Node.js & PM2 Engine
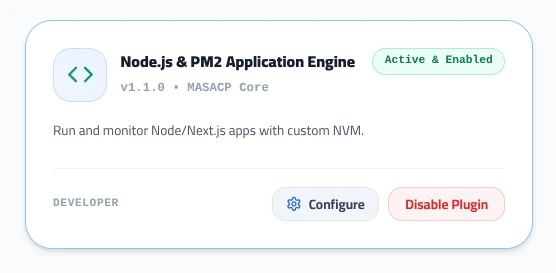
Before creating a Next.js application, ensure that the Node.js & PM2 Application Engine plugin is installed and activated on your server:
- From the left sidebar, navigate to App Store (Plugins).
- Locate the Node.js & PM2 Application Engine card.
- Ensure its status badge displays Active & Enabled (supports custom NVM, Node.js v22 LTS, and PM2 process supervisor).
2
Creating the Next.js Website
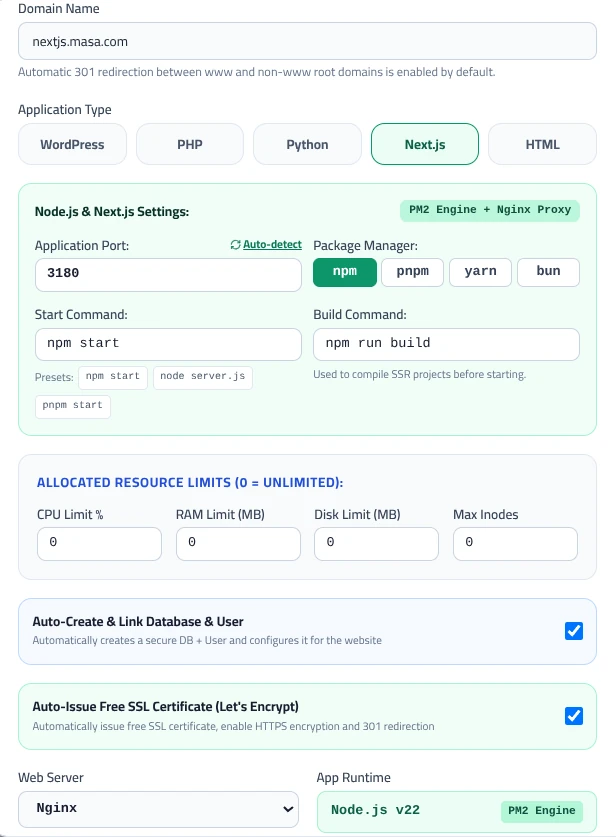
Navigate to Websites in the left sidebar, click Add New Website, and configure your Next.js application parameters:
- Domain Name: Enter your domain or subdomain (e.g.
nextjs.masa.com). Automatic 301 redirection betweenwwwand non-www is configured automatically. - Application Type: Select the Next.js tab.
- Application Port: The internal port assigned to your app. Click Auto-detect to automatically bind an available, non-conflicting port (e.g.
3180). - Package Manager: Choose your preferred tool:
npm,
pnpm,
yarn, or
bun. - Start Command: The production launch command (e.g.,
npm start,node server.js, orpnpm start). - Build Command: The production compilation command (e.g.,
npm run build) used to compile Next.js SSR pages before starting. - Allocated Resource Limits: Set optional CPU %, RAM Limit (MB), Disk Limit, and Max Inodes, or leave as
0for unlimited. - Database & SSL: Keep Auto-Issue Free SSL Certificate (Let’s Encrypt) checked. Check Auto-Create & Link Database if your Next.js API routes or Prisma ORM connect to a MySQL database.
- Web Server & Runtime: Automatically assigned to
Nginx(reverse proxy) withNode.js v22 [PM2 Engine]. - Click Create Website & App Now.
3
Locating Your App & Quick Action Icons
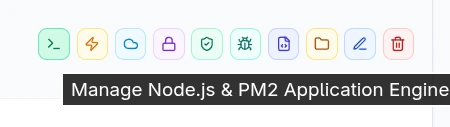
In your Websites list, locate your newly created Next.js app. The action bar provides two essential management shortcuts:
File Manager Shortcut
Quickly opens your project’s root folder in the MASACP File Manager to upload or edit files.
Manage Node.js & PM2 Engine
Opens the PM2 control center to inspect live memory/CPU telemetry, restart services, run builds, and tail logs.
4
Uploading Your Project Code via File Manager
You can upload your Next.js application files using either method:
- Click the Folder (File Manager) icon directly on your website row.
- Or navigate to File Manager in the left sidebar and browse to your project path:
/var/www/admin/websites/nextjs.masa.com/.
- Upload Clean Source Code: Upload your
package.json, source code (e.g.app/,pages/,public/,next.config.js). - Do NOT Upload
node_modules/or.next/: Always let MASACP compile packages natively on the server. This prevents architecture mismatches (e.g. macOS/Windows vs Linux x86_64).
5
Process Telemetry & Controls (Overview & Control)
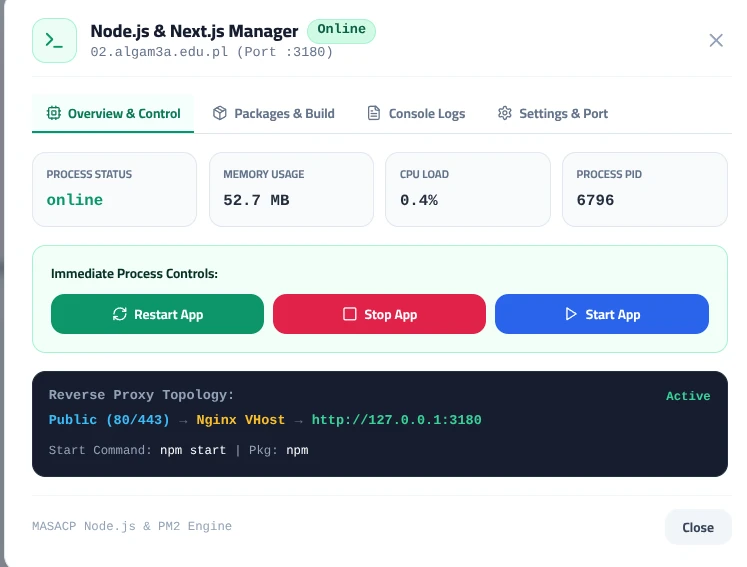
Click the Manage Node.js & PM2 Engine icon. The Overview & Control tab displays live real-time process statistics managed by PM2:
online
52.7 MB
0.4%
6796
Immediate Process Controls:
- Restart App: Performs a zero-downtime PM2 reload of your Node.js workers to apply build or code updates.
- Stop App: Gracefully shuts down the PM2 process.
- Start App: Boots the application process up if it was stopped.
6
Installing Packages & Running the Build
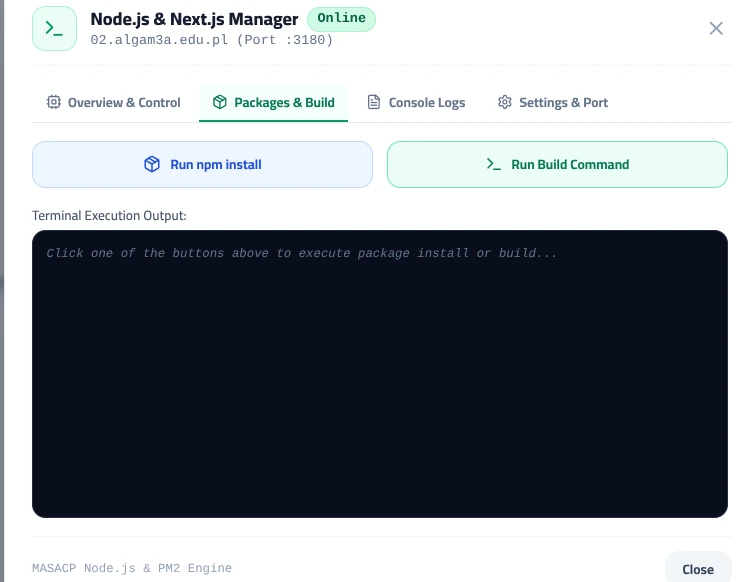
Switch to the Packages & Build tab to prepare your production Next.js build:
- Click Run npm install (or pnpm/yarn/bun install): MASACP will download and compile all packages specified in your
package.jsonwith real-time streaming output in the terminal box. - Click Run Build Command: Executes
npm run buildto produce the optimized production bundle (generating.next/standaloneor optimized SSR assets). - Once the build completes successfully, go back to Overview & Control and click Restart App.
7
Monitoring PM2 Process Logs
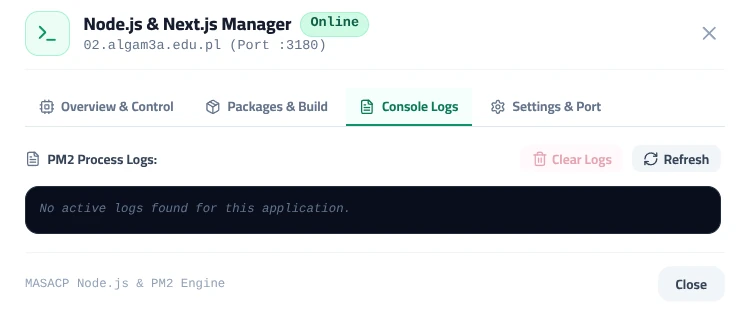
Switch to the Console Logs tab to inspect live application behavior and debug errors:
- Displays live PM2 daemon output, incoming HTTP traffic, SSR rendering errors, and uncaught exceptions.
- Click Refresh to instantly fetch the most recent log buffer.
- Click Clear Logs to reset and purge existing log files.
8
Modifying Port & Start/Build Commands (Settings & Port)
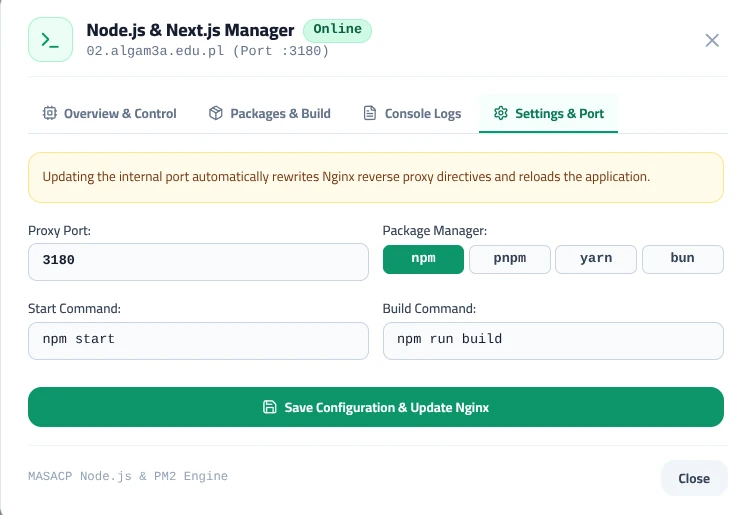
If you need to change your internal proxy port or switch commands at any time, open the Settings & Port tab:
- Proxy Port: Update the internal application listening port (e.g.
3180). - Package Manager: Switch dynamically between
npm,pnpm,yarn, orbun. - Start Command: Modify startup scripts (e.g.
npm start,pnpm start, or custom node scripts). - Build Command: Adjust build triggers (e.g.
npm run build). - Save Configuration & Update Nginx: Click this button to save changes. MASACP will automatically rewrite the Nginx reverse proxy directives and reload both PM2 and Nginx seamlessly with zero downtime.
Next.js Production Tips
For the fastest performance and lowest memory footprint in Next.js, add
output: 'standalone' in your next.config.js file.Store your production environment variables in a
.env.production or .env.local file in your project root using the File Manager.