Deploying a Python Application
Learn how to deploy, manage, and scale high-performance Python web applications (such as FastAPI, Flask, Django, or Custom ASGI/WSGI) on MASACP. Each Python application runs in an isolated Virtualenv, managed by a dedicated background supervisor process, proxied seamlessly through high-speed Nginx, with automated SSL certificates and live console logging.
Make sure your domain’s DNS A Record points to your MASACP server IP address (e.g. point
python.yourdomain.com to your server IP). Automatic 301 redirection between www and non-www root domains is enabled by default.1
Creating the Python Website
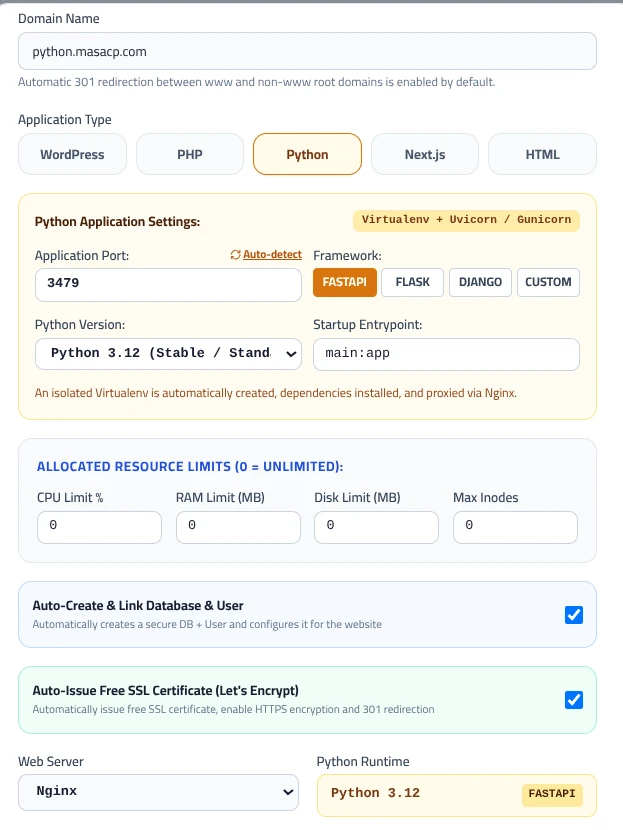
To deploy a new Python application, navigate to the Websites section in the left sidebar, click the Add New Website button, and configure your runtime settings:
- Domain Name: Enter your desired domain or subdomain (e.g.,
python.masacp.com). - Application Type: Click the Python tab.
- Application Port: The internal port assigned to your app. Click Auto-detect to automatically reserve an available, conflict-free port (e.g.,
3479). - Framework: Choose your web framework:
FASTAPI,
FLASK,
DJANGO, or
CUSTOM. - Python Version: Select the installed runtime (e.g.,
Python 3.12 (Stable / Standard)). - Startup Entrypoint: Specify the callable application entrypoint:
- • FastAPI / ASGI:
main:app - • Flask:
app:app - • Django / WSGI:
myproject.wsgi:application
- • FastAPI / ASGI:
- Resource Limits: Set CPU %, RAM, and Disk limits, or keep
0for unlimited. - SSL & Database: Keep Auto-Issue Free SSL Certificate (Let’s Encrypt) checked for instant HTTPS. Optionally check Auto-Create & Link Database if your app requires MySQL/MariaDB.
- Web Server: Configured as
Nginx(acting as an ultra-fast reverse proxy to your Python port).
2
Locating Your Python App & Quick Actions
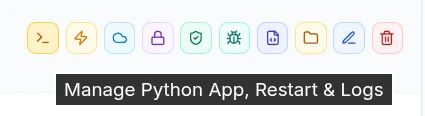
Once the site is created, it will appear in your Websites table showing active badges (Runtime: Python 3.12, Framework: FASTAPI, and Port: :3479). The action bar on the right gives you one-click control:
File Manager Shortcut
Opens the root folder of your project directly inside the built-in MASACP File Manager.
Python Application Manager
Launches the application control modal to start, stop, restart, install requirements, and view live logs.
3
Uploading Your Project Code & Requirements
You can upload your code in two convenient ways:
- Click the Folder (File Manager) icon directly on your website’s row.
- Or navigate to File Manager from the left sidebar and browse to your website’s root path:
/var/www/admin/websites/python.masacp.com/.
- Ensure your application entry script (e.g.
main.py) matches the Startup Entrypoint defined during setup (e.g.main:app). - Include a
requirements.txtfile in the root folder containing all third-party libraries needed by your application. - The isolated
.venv/virtual environment is automatically preserved and should not be manually modified.
4
Managing the Application (Overview & Controls)
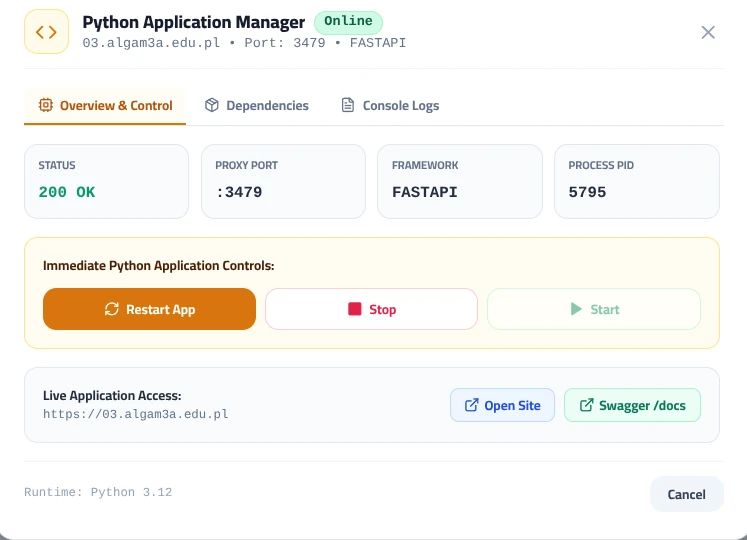
Click the Manage Python App icon in your website card. The Overview & Control tab provides real-time telemetry and instant actions:
200 OK
:3479
FASTAPI
5795
Available Process Actions:
- Restart App: Performs a graceful reload of the Uvicorn/Gunicorn worker process to apply your latest Python code changes.
- Stop: Stops the running application process when performing maintenance.
- Start: Starts the Python worker daemon if it was stopped.
- Open Site: Launches your live website over HTTPS in a new browser tab.
- Swagger /docs: If using FastAPI, opens the interactive OpenAPI Swagger documentation directly.
5
Installing Dependencies (requirements.txt)
Whenever you add or update Python packages, install them into your isolated Virtualenv without touching system packages:
- Make sure your updated
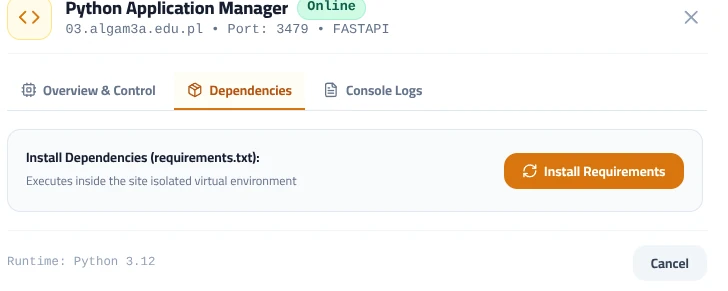
requirements.txtis uploaded to the application directory. - Open the Python Application Manager modal and click the Dependencies tab.
- Click the orange Install Requirements button.
- MASACP will automatically run
pip install -r requirements.txtinside the site’s isolated virtual environment and notify you upon completion. - Return to the Overview tab and click Restart App to load the new packages.
6
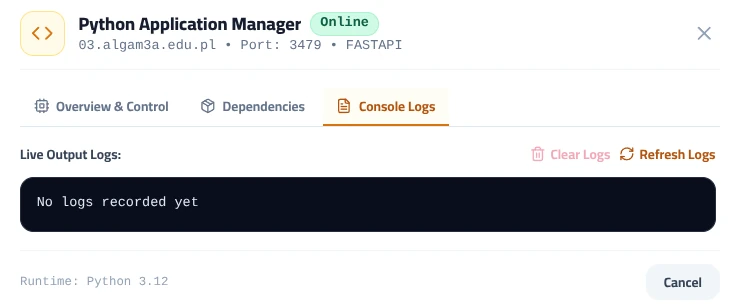
Monitoring Live Console Logs
If your application throws a Python traceback, database connection error, or startup failure, you can debug it instantly:
- Switch to the Console Logs tab in the Python Application Manager.
- View streaming
stdoutandstderrlogs emitted by Uvicorn, Gunicorn, or your Python app. - Click Refresh Logs to retrieve the latest real-time lines.
- Click Clear Logs to reset the log buffer when troubleshooting a clean run.
Best Practices & Troubleshooting
Never manually bind ports in your code. MASACP assigns an isolated port (e.g.
3479) and manages the reverse proxy automatically. Your application should accept host/port parameters or rely on the supervisor daemon.If the app status shows Offline, check the Console Logs tab immediately for missing packages, typos in
main.py, or syntax errors. After fixing the file in the File Manager, click Start or Restart App.